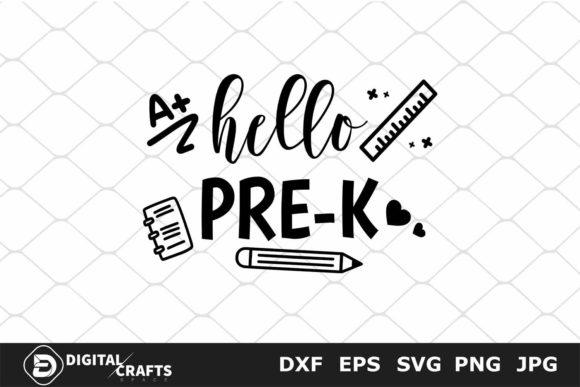
Hello Pre-k SVG, Back to School School – A Practical Resource for Creative Projects
Whether you are a teacher preparing a classroom, a parent crafting a keepsake for the first day of school, or a small business owner creating custom merchandise for the back-to-school season, the Hello Pre-k SVG, Back to School School file set offers a clean, versatile foundation for your work. This collection is not just a single graphic; it is a complete package of five digital file formats designed to work across multiple software environments and hardware setups. Understanding what each file does, how it interacts with your tools, and how to integrate it into your workflow can save you time, reduce frustration, and help you produce consistent, high-quality results.
In this article, we will walk through the practical side of using this SVG set. We will look at preparation, customization, cross-platform compatibility, and long-term organization. The goal is to help you move from download to finished project with clarity and efficiency.
What the File Set Delivers and Where It Fits
The Hello Pre-k SVG, Back to School School package contains five distinct file types in a single zip folder: SVG, EPS, DXF, PNG, and JPG. Each format serves a specific purpose, and knowing which one to use in a given context is the first step toward a smooth process.
- SVG – Ideal for Cricut Explore, Silhouette Designer Edition, Adobe Suite, Inkscape, Corel Draw, and other vector-based software. This is your primary file for cutting, scaling, and editing without loss of quality.
- EPS – Best for Adobe Illustrator, Inkscape, and Corel Draw. Use this when you need a robust vector format that preserves layers and complex paths, especially if you plan to do extensive custom work.
- DXF – Designed for Silhouette Designer Edition. This format handles line art and cut paths well, making it a good choice if you work primarily in Silhouette Studio.
- PNG (300 dpi, transparent background) – Ready for web use, digital presentations, or printing on surfaces where a transparent background is needed. The high resolution ensures clean edges at reasonable sizes.
- JPG – A flexible raster option for quick mockups, low-resolution previews, or projects where a solid background is acceptable. You can still edit, resize, and change colors in vector or cutting software as noted.
This set fits naturally into the early stages of a project – the point where you have a concept in mind and need a reliable asset to build around. Whether you are designing a personalized backpack tag, a classroom bulletin board header, or a simple t-shirt graphic, having multiple formats available means you can move from idea to output without having to convert files or worry about compatibility.
Preparation: Setup and Organization Before You Edit
Before you open any software, take a few minutes to prepare your environment. This step is often overlooked, but it directly impacts your efficiency and reduces the chance of errors later.
- Extract the zip folder to a dedicated project directory. Name the folder something like “HelloPreK_BackToSchool” so you can find it quickly.
- Check your software version against the file types. For example, if you use Cricut Design Space, confirm that you can import SVG directly. If you use an older version of Silhouette Studio, the DXF file may be your safest bet.
- Create a backup copy of the original files. Store them in a separate “Archive” folder so you always have a clean version to return to if you need to start over.
- Set your document or canvas size before importing the file. This helps you maintain proportion and avoid resizing issues that can distort the design.
This preparation routine takes less than five minutes but prevents the common frustrations of missing files, incompatible formats, or accidental overwriting. It also sets the stage for a more organized workflow, especially if you plan to use the asset across multiple projects or share it with a team.
Customization: Adapting the Design to Your Needs
The real value of the Hello Pre-k SVG, Back to School School set becomes apparent when you start customizing it. Because the files are vector-based (SVG, EPS, DXF), you have full control over color, size, and composition. Here are practical ways to adapt the design for different uses.
Changing Colors for Brand or Theme
If you are creating merchandise for a school event or a client project, matching colors is essential. In Adobe Illustrator or Inkscape, open the EPS or SVG file, select the elements you want to recolor, and apply your custom swatches. In Cricut Design Space, you can change the color of each layer individually before cutting. This is particularly useful when you need the same design to work across multiple items – for example, a red version for a teacher gift and a blue version for a student shirt.
Resizing Without Quality Loss
Vector files scale infinitely. You can shrink the design to fit a small sticker or enlarge it for a poster without any loss of sharpness. When resizing, lock the aspect ratio to avoid distortion. If you plan to use the raster PNG for print, keep the original 300 dpi resolution and only scale the vector version before exporting.
Combining with Other Assets
The design works well as a standalone element, but you can also layer it with other graphics, text, or patterns. For instance, pair it with a child’s name or a short phrase like “First Day of Pre-K” to create a personalized sign. In SVG, the paths are separate, so you can group or ungroup them as needed. This flexibility makes the file set a good building block for more complex compositions.
Integration with Your Tools and Platforms
The usefulness of this file set depends largely on how well it fits into your existing workflow. Below are common scenarios and the file formats that work best for each.
- Cricut Design Space: Use the SVG file. Import it directly, adjust layers, and assign colors. The SVG preserves cut paths and internal lines, so you can create layered vinyl or paper projects without extra cleanup.
- Silhouette Studio (Designer Edition): Both SVG and DXF work well. The DXF format is especially clean for cut lines, while the SVG retains fill colors if you want to preview the design on screen.
- Adobe Illustrator or Inkscape: Open the EPS or SVG file. These formats allow you to keep the design fully editable. You can modify curves, change stroke widths, and export to any other format you need.
- Print-on-Demand or Web Use: The PNG file with its transparent background is ready for upload to platforms like Printful, Redbubble, or a school website. The high resolution ensures it looks sharp on most devices and print sizes.
- Quick Mockups or Proofing: The JPG file works when you only need a visual reference and do not need transparency. It is also useful for sending to clients or colleagues who may not have vector software.
Having all five formats in one package means you do not need to hunt for converters or re-download different versions for different tasks. This integration directly improves your throughput, especially if you produce multiple variations of the same design for different outputs.
Quality Control and Long-Term Use
Using the Hello Pre-k SVG, Back to School School set consistently across projects requires some quality control and organizational habits. Here are observations from real use.
- Check scaling on your cutting machine before running the final cut. The preview in software is not always accurate for fine details. Perform a test cut on scrap material to verify that small elements (like thin letters or intricate lines) will cut cleanly.
- Keep a master file in SVG or EPS with your customizations saved. If you ever need to reproduce the design for a future project, you will not have to redo the color or size adjustments. Store this master file in a dedicated folder for each client or season.
- Version your files if you create multiple variations. Name them clearly, for example, “HelloPreK_Red_Sweatshirt.svg” or “HelloPreK_Blue_Sticker.png”. This prevents confusion when you revisit the project months later.
- Test the PNG transparency on your intended background. A transparent background works well on white or light surfaces, but if you are printing on a dark shirt, you may need to add a white layer behind the design. Vector software makes this easy to do.
- Archive the original zip folder in a location you can access even after the school year ends. The design may be useful again next year or for other early education events.
Practical Workflow Examples
To illustrate how the file set fits into a real project cycle, here are two brief examples.
Example 1: A Teacher’s Classroom Sign
You want to create a large “Hello Pre-K” banner for the classroom door. Open the EPS file in Adobe Illustrator, scale it to 24 inches wide, and change the colors to match the school’s palette. Add a border and a small school logo below the text. Export as a high-resolution PNG for printing at a local print shop. The whole process, from file open to export, takes about 15 minutes.
Example 2: Custom T-Shirts for a Small Business
You run a small apparel brand and sell “First Day of Pre-K” shirts for parents. You open the SVG in Cricut Design Space, resize it to fit a toddler-sized shirt, and create two color variants. You cut the design in heat-transfer vinyl and press it onto shirts in batches of ten. The DXF file serves as a backup if you switch to a Silhouette machine later. The consistent file format saves you from having to redo the design for each production run.
Observations on Usability and Consistency
When working with a pre-made design set like this, the biggest time savers are preparation and format familiarity. Because the files come in multiple versions, you can avoid the common bottleneck of file conversion, which often introduces errors or quality loss. This is especially valuable if you work across different machines or collaborate with others who use different software.
Consistency is also easier to maintain when you have a single source file that you customize once and then export to the needed formats. Instead of re-creating the design from scratch for each output, you can focus on the specific adjustments required for that medium. This reduces the risk of design drift – where small differences creep in between versions – and keeps your brand or personal style cohesive.
Finally, consider the long-term usefulness of this file set. Back-to-school themed designs are seasonal, but the files themselves can be repurposed. The “Hello Pre-K” arc can serve as a base for other early childhood phrases, and the vector shapes can be reused as decorative elements in other projects. By keeping the files organized and editable, you build a small library of assets that you can draw on for years.
The Hello Pre-k SVG, Back to School School file package is a practical resource that fits naturally into a wide range of creative workflows. Whether you are preparing materials for a single child or producing merchandise for dozens of customers, having the right file format at each stage of your process makes the work faster, more reliable, and more enjoyable.